Creating a free Oracle Cloud account is an excellent way to explore the powerful cloud services offered by Oracle without any upfront cost. Whether you’re a student, developer, or small business owner, Oracle Cloud’s free tier gives you access to a wide range of services that can help you build, test, and deploy applications. This article will guide you through the process of creating a free Oracle Cloud account step by step.
Step 1: Visit the Oracle Cloud Website
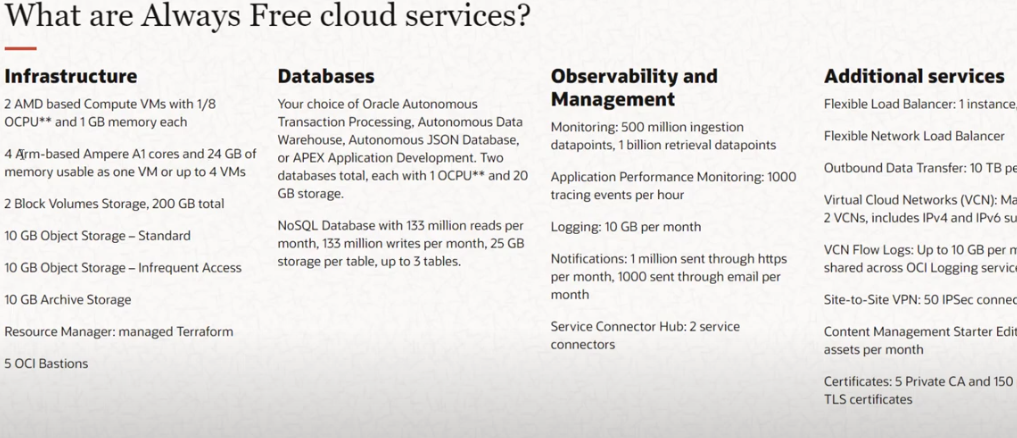
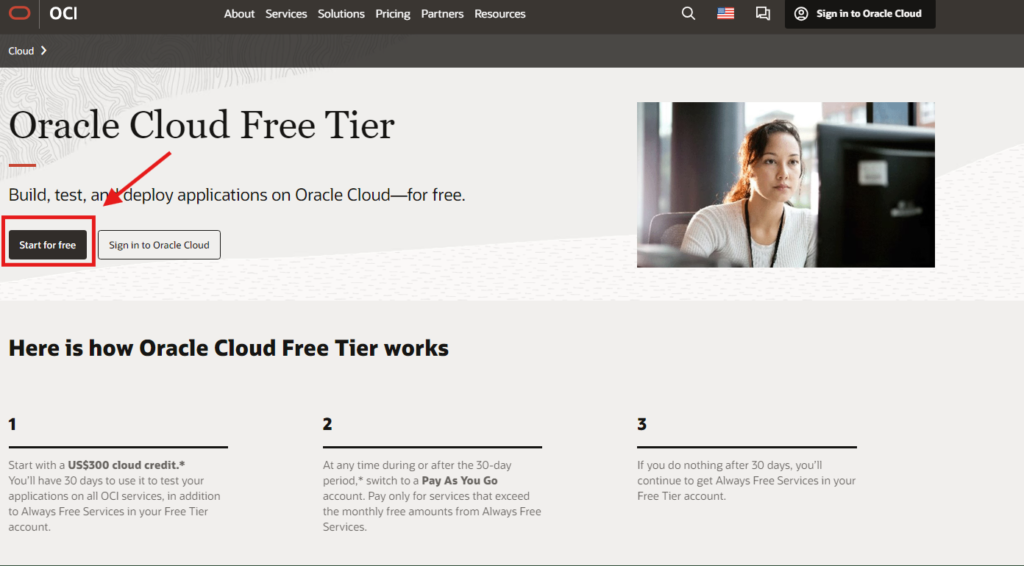
Start by visiting the Oracle Cloud Free Tier page. Here, you’ll find detailed information about the free services available to you. Oracle offers a range of Always Free services, meaning you can use them indefinitely, as well as a 30-day trial with $300 in free credits to explore additional paid services.
Bellow is the list of Major OCI Always free services with its limitation, OCI Keep Adding new services on regular basis.
Step 2: Begin the Signup Process
Click on the “Start for Free” button on the Oracle Cloud Free Tier page. You will be directed to a signup form where you’ll need to provide some basic information.
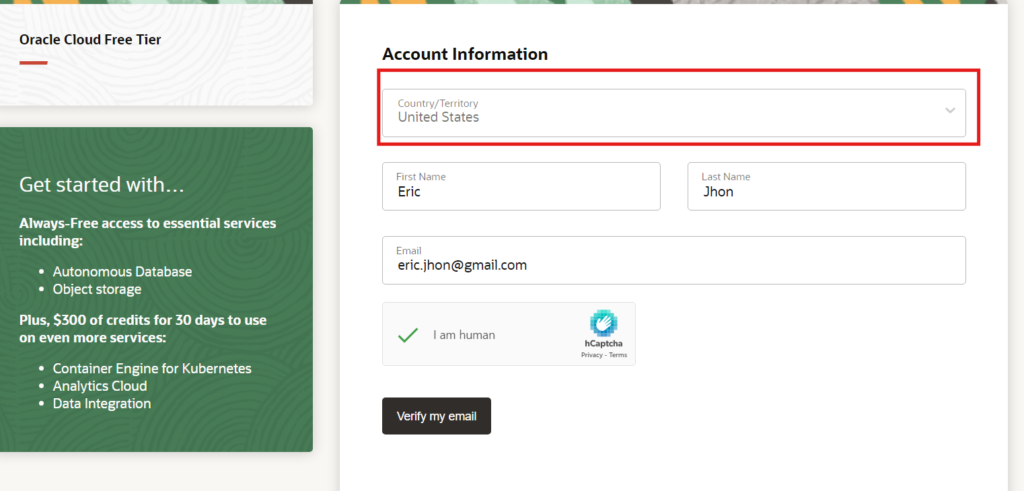
Step 3: Fill in Your Personal Information
- Name: Enter your full name as it appears on official documents.
- Country/Region: Select your country or region from the dropdown menu. Kindly Note Free Credit is based on your Region selections.
- Email Address: Provide a valid email address that you have access to, as you’ll need it for verification.
Step 4: Choose Your Cloud Account
After verifying the email form will open to enter the password.
Next, you’ll be asked to choose your cloud account type. Oracle typically offers two options:
- Personal Account: Best for individual use.
- Company Account: Ideal for businesses or if you’re signing up on behalf of an organization.
Select the option that best fits your needs.
Step 5: Set Up Your Account Details
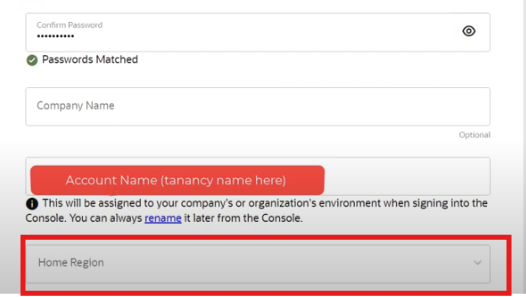
- Cloud Account Name: This will be the name used to identify your cloud account. Choose something memorable, as this cannot be changed later.
- Home Region: Select the region closest to your location. This is where your cloud resources will be hosted, and it can affect performance and compliance.
- Select home region ,Kindly select home region carefully you will not able to change it later . Some of the services are not available in some region.
- Best default region to select is US east for maximum services but you can read in more detail on oracle website .
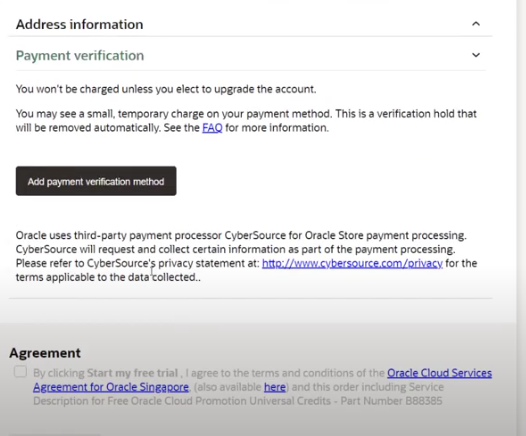
Step 6: Enter Payment Information
Even though Oracle offers a free tier, you’ll need to provide payment information to complete the signup process. This step is necessary to verify your identity and ensure that you can upgrade to paid services if desired.
- Credit/Debit Card: Enter your card details. Note that Oracle may place a temporary hold (usually $1) on your card to verify it, but this will not result in a charge unless you opt for paid services later on.
- Kindly note , Oracle accept credit cards and debit cards that function like credit cards. It do not accept debit cards with a PIN or virtual, single-use, or prepaid cards.
Step 7: Verify Your Email and Phone Number
After providing payment information, you’ll receive an email with a verification link. Click the link to verify your email address. You may also need to verify your phone number by entering a code sent via SMS.
Step 8: Log In to Your Oracle Cloud Account
Once your email and phone number are verified, your Oracle Cloud account will be created. You can now log in to the Oracle Cloud Console using the credentials you set up during registration.
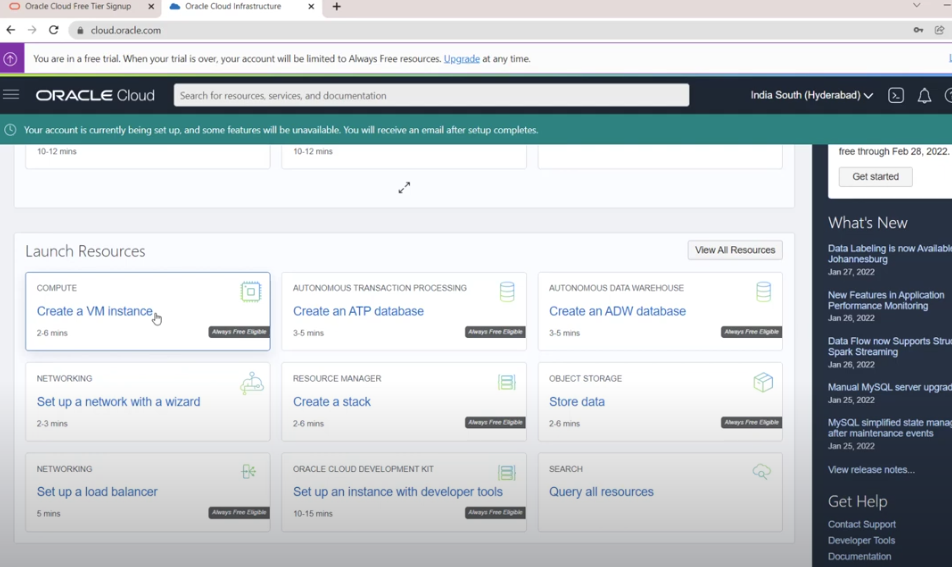
Step 9: Explore Free Services
After logging in, you’ll have access to the Oracle Cloud Dashboard. From here, you can explore the free services available under the Always Free tier.
Step 10: Start Building
With your Oracle Cloud account ready to go, you can start building and deploying applications, exploring Oracle’s wide range of services, and taking advantage of the resources available to you for free. I have many mini project in this blog cybertoffy.com and on my YouTube channel on how to use oracle cloud free tier to its fullest you can subscribe to my YouTube channel here
Conclusion
Creating a free Oracle Cloud account is straightforward and gives you access to powerful tools and services at no cost. Whether you’re looking to learn more about cloud computing, develop new skills, or deploy real-world applications, Oracle Cloud’s free tier provides a robust platform to get started.
If you have any questions or need further assistance, Oracle’s support resources and community forums are great places to find help. Happy cloud computing!
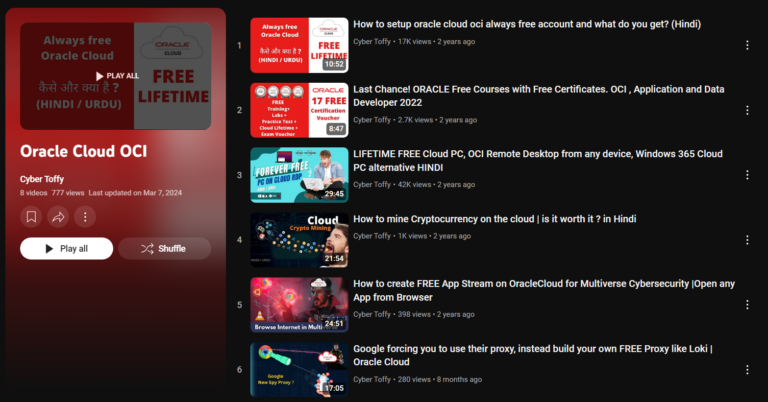
Click Bellow for Oracle Cloud OCI Full Playlist.